"Go buy broodwar you lazy arctic sasquatch!"
-Phoenix-S
|
| A couple of aussies go PvZ on Temple | | | Author: | | | IP: | proxy01.XXXX | | Date: | 12/01/01 08:12 | | Game Type: | Starcraft | | Labels: | none | | Report Rating: , # of Ratings: 2, Max: 7, Min: 6
Lifetime Rating for PoetryEmotion: 6.5000 |   |  This is my first battle report, and being without any image manipulation programs (or the knowledge to effectively utilize them), I had to venture into the strange and disturbing world of mspaint for my screenshots. Fortunately I at least have a recent version that can both read PCX and save as JPEG. Anyway, go easy on me. :)
 The replay that goes with this report can be found here.
Map Name:
Lost Temple
Players:
21mara, Brown Zerg at the 12 o'clock start
Axemara, Teal Protoss at the 9 o'clock start
Observers:
PoetryEmotion, your intelligent, attractive, and most of all *modest* chronicler. :P
 21 started the game off with a 2nd Hatchery at the bottom of his ramp followed by a Spawning Pool, while Axe went with a couple of Gateways near his own ramp. Axe's scouting Probe attacks the Hatchery morphing at the bottom of 21's ramp, but is left unnatended and is destroyed by an unnecessarily well microed Drone.
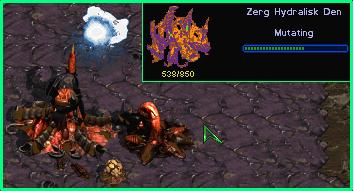 21 builds a third Hatchery at his natural while reinforcing his choke with a Sunken Colony. Axe meanwhile, stations some Zealots to defend his ramp and warps in a Forge. 21 makes an exploratory attack with 6 Zerglings, but retreats to Axe's natural with the loss of a single Zergling after a brief scuffle with the 4 Zealots defending the ramp. Axe is now warping in a Cybernetics Core, slowly teching towards High Templar. He sneaks a Probe out past the Zerglings to scout 21's base, but is thwarted by the Sunken Colony at the bottom of the ramp and doesn't make it up to see the morphing Hydralisk Den.
21 begins massing a small force of Hydralisks and Zerglings outside Axe's base, and an investigatory Zergling discovers two Photon Cannons on the cliff guarding the approach, which are soon joined by a third. Axe's Zealots sit at his still vacant natural. 21 has had his expansion running for a while now, and the vespene gas advantage will soon begin to show. Axe sneaks another Probe out, and this time makes it up the ramp and into 21's main. There it finds the recently morphed Lair and dual Evolution Chambers shortly before being shredded by a pursuing Zergling.
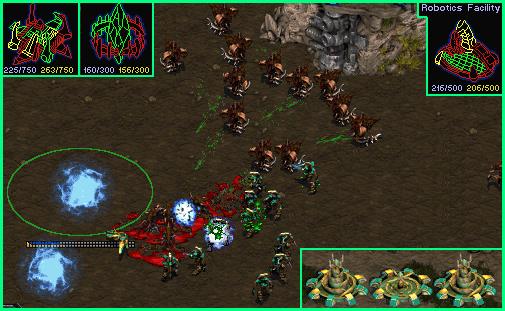 Axe warps in a third gateway, then a Robotics Facility and a Nexus at his natural. Spotting the budding expansion through his Overlord stationed over the cliff of Axe's natural, 21 chooses this moment to attack with the force of Hydralisks and Zerglings that has been gathered outside Axe's base. The Zealots (with support from the Photon Cannons on the cliff) are too powerful however, and the attack is beaten back. 21 retreats his surviving Hydralisks to a containment position outside Axe's natural.
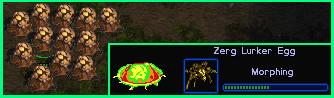
Following the attack, Axe reinforces his natural with two Photon Cannons, and stations some High Templar on the cliff. 21 has morphed a Hive, for Cracklings (Zerglings with Adrenal Gland Upgrade), Ultralisks and Defilers, is researching Lurker Aspect, and is in the process of double expanding to the 3 o'clock main and natural. He sends more Hydralisks to outside Axe's natural, and sets them patrol dancing to make them less susceptible to a Psi Storm raid. Shortly afterwards 21 pulls back a control group of the Hydralisks to a safer position and morphs all 12 into Lurkers, spreading them out in a containment position outside Axe's natural when they're done.
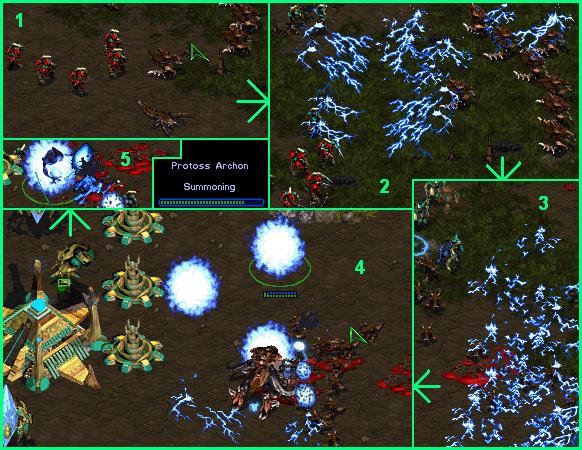
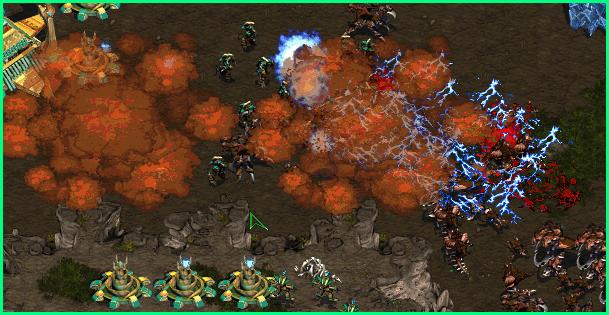
Axe continues to mass Zealots and High Templar at his natural, and attempts to remove the Lurker field with the some Observers and a lone Reaver. Axe briefly goes Overlord hunting with a Corsair, but it is killed by the Hydralisks outside his natural on their way to toast the Reaver. The Reaver killing expedition draws out the large group of Zealots stationed at Axe's natural (see pic, section #1) and they meet a nasty end in the Lurker field. They are supported by 6 High Templar (see pic, section #2), however the storms only manage to take out 4 Lurkers. As Axe retreats the Templar back to his natural, they are pursued by Zerglings. Axe storms them with all the Templar selected, making for a nice screenshot (see pic, section #3), but draining the Templar and killing only about 8 Zerglings. The surviving Zerglings are destroyed by some reinforcing Zealots, and Axe warps the Templar into Archons (see pic, section #4). 21 immediately presses the attack with 3 control groups of Cracklings and an Ultralisk. One of the Archons is destroyed before it finishes warping, and the other two fight off the attack with the help of some more reinforcing Zealots (see pic, section #5).
21 manages to draw out and kill a few of the defenders with a plague, and brings up 12 Ultralisks to join the small group of Zerglings and Hydralisks he has camped at his Lurker field outside Axe's natural. He has Overlords stationed at each of the two island expansions, and a Hatchery at every ground expansion on the map, with 13 hatcheries in total. Axe is still running from just his natural expansion, and his almost completly mined out main. At this late stage in the game, 21's melee troops are at 3/3 upgrades (although the hydras/lurkers are at 0/3), and Axe's troops are at 2(attack)/1(armor)/0(shields). Some more Ultralisks and Zerglings join with the troops massed outside Axe's base, and under the cover of a couple of Dark Swarms to nullify the Photon Cannon fire (not that it's really needed), 21 attacks in full force. The troops steamroll the defenders and crush the expansion, and ggs are exchanged as they push us the ramp into Axe's main. The replay continues for a while afterwards (at my request) as they muck around a bit (watch for the devastating 8 probe drop at the 6 o'clock main, Mark4 eat your heart out, hehe) and 21 destroys Axe's main and then an expansion Axe had created at the island in the top left of the map just before the end.
 Things I learnt:
 Both these players are a lot better than me (I'm not much better than your average BGHer, lol), so I won't comment too much on their strategies, just a few things I noticed (not that this is the first time I noticed them though, I'm not *that* bad :D) that might help me in future games. Firstly, a good zerg player really needs constant pressure on them to stop them spreading over the map. If you let them out expand you you're a gonner. I guess that applies to all races, but Zerg especially. Secondly, if you're being contained, you either need to break out early, or use drops (chances are you won't have the resources for heavy air) to get around it and stop the other player gaining complete map control.
 The Scores:
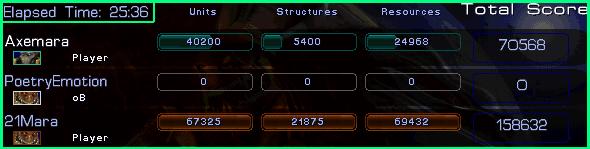
 As you can see, it was a pretty one sided game after the early parts. Axe would probably like it noted that he was having a bad day and was pretty tired at the time of this game. That PoetryEmotion really needs to work on her game doesn't she? :P
|
|
|
|
 Home
Forum
Starcraft Tournaments

