|
Due to popular demand, I have created a
second report on Combat Mission: Afrika Korps. If you haven't
read my
first report on the game, I suggest you do so. For those
of you who did read it, skip the next couple of paragraphs. They
are meant to introduce people to the game. 56-kers beware: There
is a large amount of pictures in this report.

CMAK is a 1-2 player, hybrid turn-based/realtime
3D simulation of WWII tactical warfare in parts of the Mediterranean
Theater including North Africa, Italy, Sicily and Crete from
1940 to 1945. The fluid game interface combines with 3D lines
of sight, misidentification of targets, enemy detection by sound,
advanced armor penetration systems, unit morale and leadership
effects, spreading fires and billowing smoke, wind and weather
- and much more to bring you unprecedented realism in a computer
simulation.
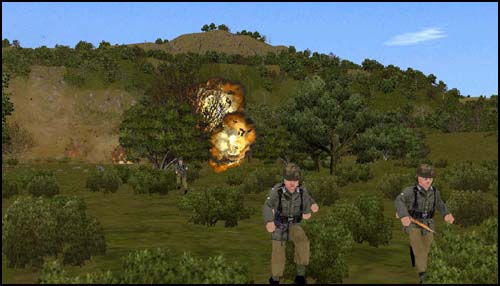
Units are squads, teams, and individual vehicles. You can command
a force as small as a depleted platoon, or as large as a several
reinforced battalions. Each man and weapon is kept track of for
maximum realism but because of the power of today's desktop computers
not every single man in the squad will be shown. Three men show
a normal squad, one man shows a company of a platoon leader,
etc.
Full Tables of Organization and Equipment for all the nations
represented (Germany, USA, Italy, Britain, Canada, New Zealand,
Australia, Poland, South Africa, France) are modeled with thousands
of different unit types available depending on the year, month
and region.

There are two types of maps in Combat Mission:
Afrika Korps. Battle and Operation maps. Individual fights will
occur across a Battle map while the longer operations (several
linked battles) are fought with the Operation maps.
Each turn is equal to 60 seconds of combat. Players give orders
in a turn-based fashion, and then these orders are simultaneously
executed for 60 seconds of real time action. Then the next orders
phase begins. A typical scenario lasts about 20-60 turns, or
20-60 minutes of simulated combat but the player can adjust this.
While the game is based on its award-winning
predecessor, Combat Mission: Barbarossa to Berlin, it introduces
new desert environments and terrain types, as well as features
like multi-turreted vehicles and dust clouds from explosions
and moving vehicles.
1941: With most of Western Europe conquered,
Nazi Germany set its sights on the Soviet Union. Then in April,
Germany invaded Yugoslavia because a pro-Allied coup had overthrown
the old regime, which was allied to the Axis powers. Britain,
taking advantage of an opportunity to strike back at the Axis,
landed troops in Greece, leaving Hitler no choice but to invade
that country or have his southern flank exposed. Using overwhelming
force and superior tactics, the Germans easily overran Yugoslavia
and Greece. The Allies had no choice but to evacuate mainland
Greece or be cut off and surrounded by the Germans. The Allies
evacuated to the largest island the Greeks possessed: Crete.
Faced with the threat of air attacks
from the Allied air bases on Crete and pressed for time, men
and equipment on the eve of Operation Barbarossa (the invasion
of the Soviet Union planned for June), Hitler decided to launch
a lightning air assault to take Crete code-named Operation Mercury.
German High Command ordered their elite paratroopers to take
the island. The paratroopers were highly disciplined, dedicated
and skilled, proving themselves in the western campaigns of 1940.
Unknown to the Germans, the Allies knew of the imminent German
attack and began digging in. What was to follow would be one
of the bloodiest airborne operations in history…
After finding an opponent, someone going
by the name of Drach, and discussing what kind of battle we would
fight, Drach and I came upon a conclusion. The battle would be
an Axis probe, which means that the Axis carry out an attack
but get a little more points ("Money" that you use
to buy your forces) then the defender. The time of battle would
be May 1941, during the fierce battles fought on Crete.

Using the points that I had, I bought,
what I thought was, a balanced force of machine guns, mortars,
and assault squads. Because I knew I would be up against a heavily
fortified enemy, I bought myself some flamethrowers, which, if
used effectively, could route an enemy squad with one spray.

After picking my forces, I pressed done
and the map loaded. The map had three dominating features: A
town, a hill on the right side of the town, and a forest behind
the town. The town, which ran alongside a road, was small and
was a stepping-stone for the two flags behind it.
In the unit placement phase, I positioned
most of my forces on the eastern part of the map, with an MG42
and a mortar watching my left flank. My plan would be to move
across the hill on the eastern part of the map, then enter the
town. I would move house to house up the town before making a
flanking maneuver to capture the flags.
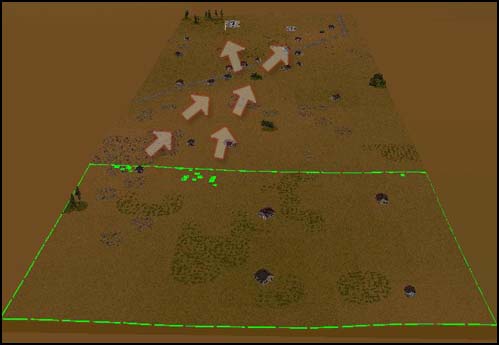
Action came quick, as I received suppressive
fire from a concrete bunker behind the town. As my infantry ran
towards cover, they spotted a British tank in the town. The bunker's
suppressive fire stopped a couple of squads from advancing, splitting
my infantry into two groups. The group that escaped the machine
gun fire quickly entered the town to find that house to house
fighting would ensue, as they spotted British infantry nearby.

The British tank, which was only mounted
with a machine gun, was still in the town and an easy target
for my infantry. A couple of my infantry squads were located
in one house, an inviting target for the British, so I ordered
some to run across the street so they could knock out the tank
and continue moving up the town. The first squad that crossed
the street managed to receive no casualties due to suppressive
fire put on the British by the squads still in the house. One
squad after another began crossing the street and into a house
overlooking the tank. The tank, seeing the danger from the grenade
wielding Germans, retreated.

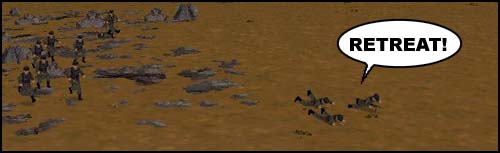
Meanwhile, on the eastern part of the map,
the separated squads, stopped by machinegun fire, were now beginning
to route. I ordered the squads not in panic to retreat behind
a building.
Back in the town, the German paratroopers
were advancing up the town, finding stiff resistance from the
British, who were reinforcing their positions. As a German squad
entered another building, they found a British squad in the adjacent
building. Fierce fighting erupted. The British tried to stop
the troops from advancing deeper in the town and let loose a
hail of small arms fire aimed at the Germans trying to reinforce
the battle stricken squad fighting the British.
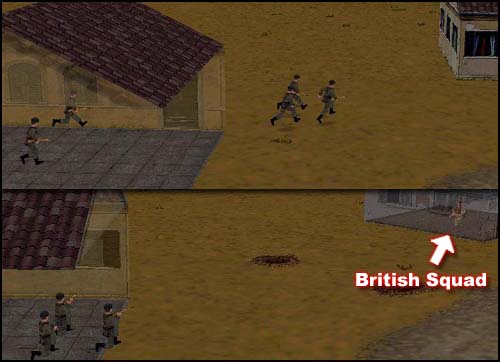
Grenades were thrown, as both sides tried
to gain the initiative. Soon there were 3 German squads with
a flamethrower team fighting a lone British squad, house to house.
The British now saw the house-to-house fighting as an opportunity
to stop the Germans from advancing and began a counter-attack.
This counter-attack failed but there was still no gains made
by either side in the desperate fighting.

The German squads then used their demolition
charges. The Germans chucked the TNT pack, which exploded, causing
the house to explode and the British inside to panic. The British
then concentrated their fire on the building occupied by 4 German
squads. The light building did little to protect the Germans
inside from the murderous amount of small arms fire being directed
at them.
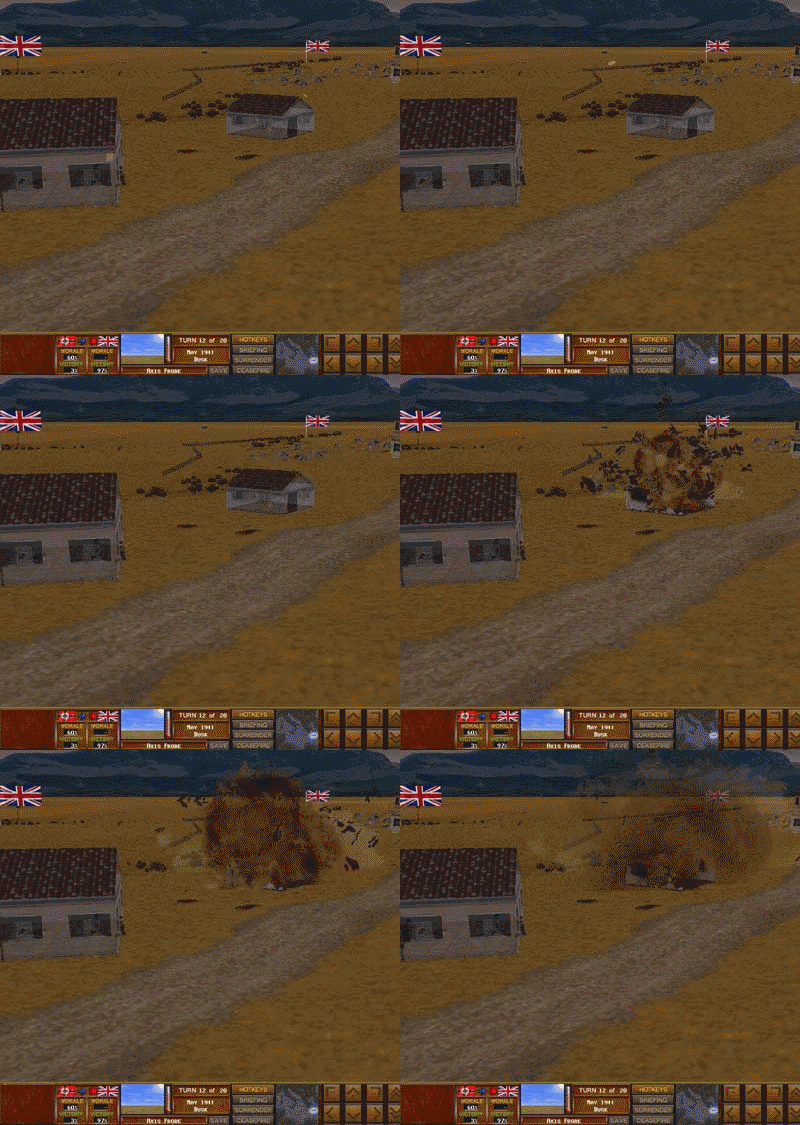
The British then began to reinforce the
bombed out building, leaving me no choice but to send more troops
into the fray. As my reinforcements tried to reach the battle,
they were decimated by machine-gun fire from the concrete bunker.
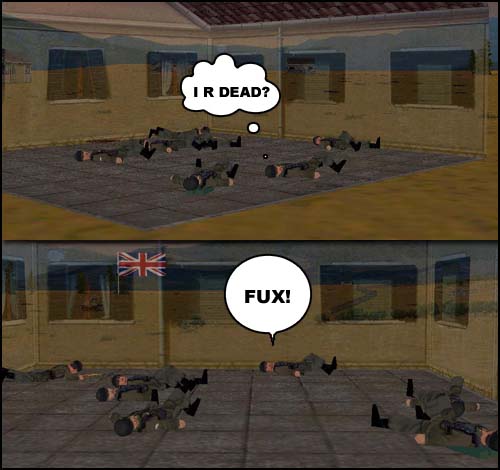
Meanwhile, the German squads pinned down
in the buildings were dropping like flies. Five squads in one
building became two squads in a matter of minutes. The position
held out until it finally collapsed a few minutes later. The
British made another counter-attack, which could not be stopped
because I had no more troops that combat ready. All were either
wiped out or broken. The only thing left for me to do was surrender.
With that, the battle was over and a total defeat was handed
to me.

While the German paratroopers were fighting
for Crete, German reinforcements from the mainland tried to arrive
and help out by supplying men and equipment to the battle stricken
troops. They were organized into two convoys. The British intercepted
the first convoy, nearly decimating it, while the second convoy
was canceled to avoid a similar fate. The surviving ships and
men of the first convoy reached Crete and unloaded their precious
goods. These came just in time, as the British knew about the
landing. They sent some of their best men and tanks into stopping
the Germans from re-supplying their attacking paratroopers. This
was to be one of the last fights that occurred during Operation
Mercury…
This game was to be played against Tigrii,
an experienced CMAK player. As before, this battle was to be
fought during the invasion of Crete. I was the German defender,
while Tigrii was the Allied attacker. The attacker gets 500 more
points than the defender in this type of scenario. Not knowing
if my opponent would use mostly tanks or infantry, I compromised.
I bought an equal amount of anti-tank and anti-infantry weapons.

In a more detailed explanation of my forces,
I bought one platoon of paratroopers, one platoon of mountain
infantry, three heavy MG34s, a couple of anti-tank mines, a pillbox,
a Panzer IV, a tank destroyer, the famous 88mm Flak, and a couple
of guns (Some howitzers, some anti-tank). After picking those
forces, I pressed done and looked at the map.
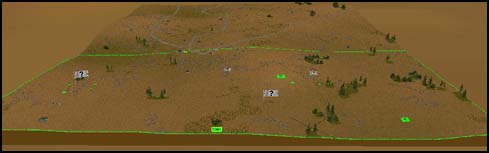
There were 4 flags, with two being major
and the other two being minor. Three roads ran from the Allied
setup zone and into a very small town in the middle of the map.
My defensive area was perfect for setting up ambushes. I placed
my machine guns so that they would have a clear line of sight
between them and the unsuspecting attacker. I placed my guns
in the trees to give them better cover and concealment. I placed
my tanks behind trees, as they were my reserves, ready to move
to support the line wherever it fails. My main problem would
be a hill that overlooks a big portion of the map. I would have
to wipe out anything that was up there in order to prevent the
enemy from blasting away at my positions. I placed the anti-tank
mines in the town just in case Tigrii had any ideas. Last but
not least, I placed the MG bunker on top of a hill that overlooked
the town and everything around it.

Double-checking my defenses, I was sure
that this line would not be penetrated. Now the moment of truth
had arrived. The first couple of turns were uneventful, aside
from a coulee of infantry squads scurrying about on the other
side of the map. Not long after, my worst fears were confirmed.
Tigrii sent his tanks on the big hill. Not far behind were his
big guns, embarked on trucks. Defying orders the MG bunker fired
burst rounds on enemy infantry moving slowly towards some rocks.
Now the enemy tanks, which were Matildas (Infantry tanks), opened
fire on the bunker. The bunker, which was protected by reinforced
concrete survived and smoked itself, preventing the enemy tanks
to fire at it accurately.
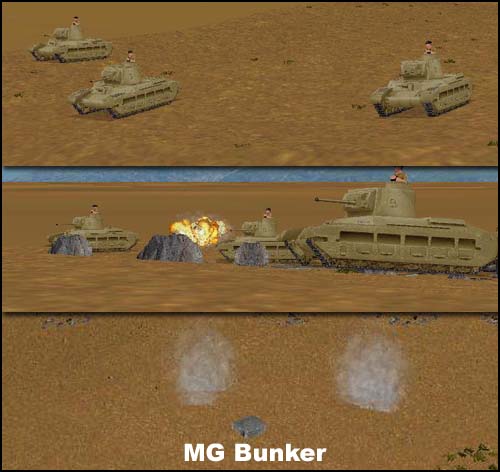
The tanks then moved down the hill towards
my defensive emplacements. They spotted my panzer, which was
hiding behind some scattered trees, and began firing at it, damaging
its gun. Shocked that the British might take out one of my only
tanks, I ordered my 88 Flak to open fire on the tanks. The lightly
armored Matildas were no match for the 88mm gun and were quickly
dealt with. Lashing back, Tigrii knocked my 88 out with artillery,
which also knocked out mortar teams close the 88.

After the smoke subsided around my pillbox,
it couldn't help itself (again). It targeted an unarmored truck
that was moving Tigrii's artillery around the map. The truck
was knocked out but the artillery was already disembarked. The
artillery opened fire of the pillbox, destroying it in a fiery
explosion.

Now the battlefield became quiet, a sign
that even heavier fighting would break out. On my right flank
an infantry squad, which was probably probing my lines, came
to close to one of my machine guns and paid the price. The MG34
ambushed it and sent it into a route. My machine gun was then
pounded by an artillery piece, the same one that took out my
pillbox, which was identified as a 25-pound gun.

Unknown to the German MG34 squad, a British
assault squad had sneaked by them and into some scattered trees,
occupied by a 75mm infantry gun. Horrified by this, I ordered
my 37mm anti-tank gun nearby to open fire on the British squad,
which still didn't find my infantry gun (it was hiding in a foxhole).
Tigrii, who had to leave, then halted the battle. Combat Mission
> Life.

A couple of days later I found Tigrii and
we resumed our game. Anyway, the British squad still didn't find
my infantry gun and the anti-tank gun bombarding it had no effect
on the squad. Unfortunately, the squad found the hidden infantry
gun and knocked it out after a few seconds of combat.
With my right flank in danger of collapsing,
I ordered my reserve panzer to help out. I also ordered a couple
of infantry squads defending one of flags nearby to assist. The
situation looked bleak. The reinforcing squads that arrived were
quickly forced to go back to their original positions by the
British, who quickly exploited my weakening flank. The panzer
that arrived was then unable to use its gun, which was damaged
in combat with the Matildas earlier.

Sensing an infantry assault coming towards
my main flag on the right flank, I reorganized my defense, placing
my heavy machine guns on hills overlooking the paths below and
palcing the other squads on hold, ready to counter-attack. I
used my "unusable" panzer to make Tigrii think twice
about an assault, knowing that if an attack did come the panzer
would be of no use to me.
A fierce artillery barrage then rained
down on my right flank, pinning my men down. Then smoke rained
down on the area, a sign that the assault was about to begin(smoke
blocks line of sight). One after another, the British squads
walked through the smoke and into hell. Machine gun ripped the
British squads into pieces forcing them to halt and seek cover.
My MG34 found a hole in the smoke and began firing at the British.
Behind the assualting British, an armored car came to assist
the pinned down troops. Shortly after, it was destroyed. Another
armored car raced over a hill and into a wall of infantry. A
couple of grenades later the armored car was knocked out. Nearby,
in the scattered trees, a mortar crew, using only their lugers,
wiped out a depleted assault squad.

Meanwhile on the other side of the map,
British infantry were walking down the slope of the big hill
and up towards my defenses. Then a huge artillery barrage shook
the earth. British infantry used it as cover and began moving
forward. An MG34 squad waited too long to ambush the approaching
British and was annihilated. Wanting to avoid the same fate as
the other infantry gun, I ordered an infantry gun in the trees
to open up on the advancing British. The gun caused some casualties
and made one squad retreat. Sadly, there were too much British
infantry for one gun to handle and it was quickly overrun.

Fierce fighting erupted on the left flank,
as the British infantry broke through. They were all converging
on the main flag on that side of the map. My tank destroyer tried
to halt the infantry but was knocked out by the 25-pound gun.
Infantry behind the flag we gunned down by the last armored car
the British had. The left flank was nothing more than a memory.
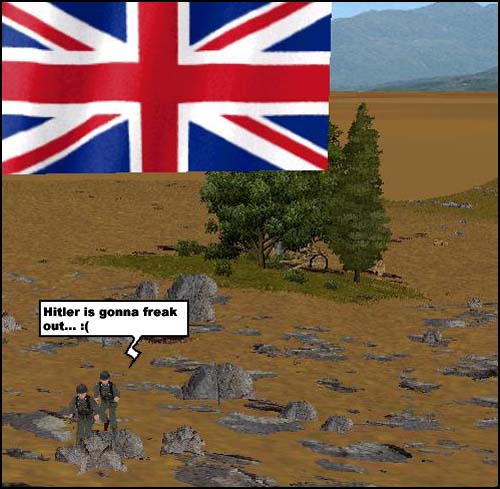
The right flank, on the other hand, still
had hope. The last armored car, after mowing down the infantry
on the left flank tried to mow down the defenders of the flags
that I possessed. On the way, British artillery knocked it out,
doing me a huge favor since my infantry was low on ammo and out
of grenades. Meanwhile the British assault on my positions had
gone stale. Smelling fear, I ordered a counter-attack. British
moral plummeted. Their retreat turned into a route and, using
a couple of hand grenades, resistance on my right flank was wiped
out.

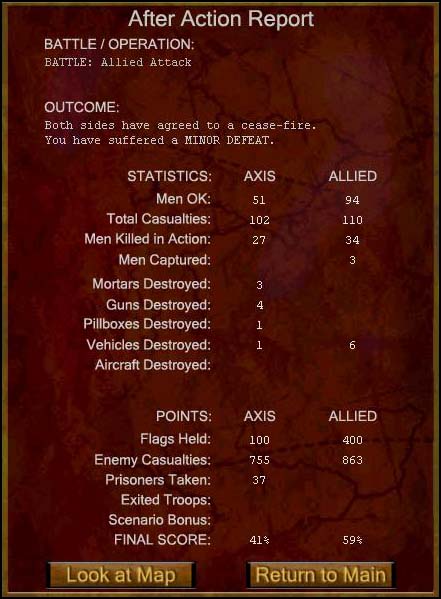
Both sides were now exhausted from combat,
but luckily they wouldn't have to fight again, since the battle
was now over. I suffered a minor defeat but the British won a
hollow victory. For some reason the game decides if you agree
to a cease-fire or not.
The capture of Crete using only paratroops
was a testament of the power of airborne infantry. Despite the
success achieved, the high cost of the seizure of the island
led Hitler to lose confidence in airborne operations. The possession
of Crete proved of little offensive value to the Axis Powers
because subsequent developments in the overall situation prevented
them from exploiting their success. To the Germans Crete was
not a stepping-stone to Suez and the Middle East, but rather
the concluding part of the campaign in the Balkans.
Moreover, after October 1941 the shortage
of trained ground forces compelled the German High Command to
commit trained airborne and parachute units as infantry in Russia.
General Student, the head of the German airborne divisions, therefore
seems to have been justified in stating in a post-war interrogation
that "Crete was the grave of the German parachutists." |
 Home
Forum
Starcraft Tournaments
Home
Forum
Starcraft Tournaments


